
Key takeaways
- Drop a band, don’t add one. Pressure moves you toward 15–25% deflection, not toward sprint. The ball closer to your feet is the ball nobody can poke.
- Turn away from the second defender, not the first. The first defender is bait. Use the shield touch to make them commit, then release into the space they vacated.
- Accept the backward pass. The dribble exists to buy you a pass lane, not to beat two players every time. A completed backwards pass keeps possession; a failed double nutmeg ends the attack.
Goalbound’s dribble isn’t a button — it’s a stick discipline built from three layers: keep the movement stick inside roughly 25–45% of its travel to hold close control, carry your momentum through the touch instead of stopping dead, and treat the release of the stick in the final fraction of the contact animation as the thing that decides whether the next touch is a nudge or a push. Get the stick layer right and skip the momentum layer and the ball still runs away from you under pressure; get all three in order and a two-man press stops being a problem. The routine below is built to train those three layers separately before you ever combine them in a match.
Our top picks


As an Amazon Associate we earn from qualifying purchases at no extra cost to you.
How the Goalbound dribble actually works
Every stick-based football game, Goalbound included, resolves a dribble as a short animation triggered by your input, not as continuous physics. That single fact explains almost every “why did my player take a heavy touch” moment: you didn’t lose the ball to the defender, you left the close-control animation by pushing the stick past the band that holds it. Treat the stick as a dial with four useful positions rather than a direction.
Layer 1 — Stick input: deflection matters more than direction
Deflection is how far you push the stick from centre, measured as a percentage of full travel. Direction decides where you go; deflection decides how far ahead the ball sits. The bands below are practical training targets rather than fixed engine values — exact thresholds shift between builds and platforms, so confirm against your own control settings and tutorial prompts, which always take priority over a general rule.
| Stick deflection (% of full travel) | What the player does | Use it when | Main risk |
|---|---|---|---|
| 0–20% | Micro-adjusts; ball stays within one stride | Shielding, waiting for a pass lane to open | You stand still and get closed down |
| 25–45% | Close control at jogging pace | Default dribbling, press resistance, tight areas | Minimal — this is the default band |
| 50–70% | Push-and-run; ball leaves the foot | Open grass ahead, no defender within ~5 m | Heavy touch the moment pressure arrives |
| 75–100% | Sprint; ball sits well ahead | Breakaway with nobody recovering | Ball is pokeable by any trailing defender |
The mistake almost everyone makes is jumping from the 25–45% band straight to 75%+ when a defender appears. That’s backwards. Pressure means less deflection, not more.
Layer 2 — Momentum: the touch inherits your speed
Your player’s speed at the moment of contact is baked into the next touch. Sprint into a touch and the ball leaves fast regardless of how gently you moved the stick afterwards. This is why the fix for heavy touches isn’t “be gentler” — it’s “arrive slower.” Coming out of a sprint, take one deliberate half-second of jogging before you try to turn or cut. In practice, that means releasing the sprint input about two player-strides before the defender, not on contact.
Layer 3 — Touch timing: the release window
Each close-control touch has a contact animation, and the stick release inside the last portion of that animation determines the next touch’s weight. As a working rule, aim to release the stick 80–120 ms before the animation ends: too early and the player takes a settling touch that kills your speed, too late and the touch is stretched and the ball escapes the close-control band. On a 60 Hz display one frame is 16.7 ms, so that window is roughly five to seven frames — enough to feel, not enough to see. You learn it by counting touches, not by watching.
A 12-minute practice routine that transfers to matches
Train the layers in order, then combine. Do this in a training or free-play mode rather than a match, because match pressure makes you default to the sprint band within seconds.
| Drill | Time | Volume | Pass criterion before moving on |
|---|---|---|---|
| Stick walk — jog only, no sprint input | 3 min | 10 lengths of the pitch | Ball never more than one stride ahead |
| Cone weave at 30–40% deflection | 3 min | 6 runs through 5 cones | No missed cones and no accidental sprint |
| Press simulation vs. one AI defender | 4 min | 8 × 20-second reps | Keep possession for the full 20 s in 6 of 8 |
| Release-timing drill — touch, stop, repeat | 2 min | 20 deliberate touches | 16 of 20 touches stay inside your target zone |
Concrete example: a winger receiving on the touchline with a full-back closing. In the drill terms above, that’s a 30% deflection approach into the defender, a drop to 15% to shield for one touch, then a 55% push-and-run as you turn — with the sprint input arriving only after the turn is complete. Most players press sprint first and turn second, which is why the ball ends up two metres away and the full-back gets a free clearance.
Which approach fits your situation
There is no single correct dribble style. Match the approach to your setup and your opponent, and accept the trade-off each one carries.
| Your situation | Approach | Stick input | Trade-off |
|---|---|---|---|
| New to the game, touchscreen only | Jog-band dribbling, sprint disabled | 25–40% | Slower progress up the pitch |
| 60 Hz display or noticeable input lag | Plan one touch ahead, avoid reactive cuts | 25–35% | Less improvisation, more predictability |
| Facing a two-man press | Shield, half-turn, then burst | 0–20%, then 40–55% | You concede forward momentum briefly |
| Open grass, no defender within 5 m | Push-and-run | 55–70% | Ball is exposed if a defender recovers |
| Small phone screen, thumb-heavy input | Wider arcs, no micro-flicks | 30–45% | Slightly heavier touches in tight space |
Keeping the ball glued under a two-man press
Three rules cover nearly every press situation:
- Drop a band, don’t add one. Pressure moves you toward 15–25% deflection, not toward sprint. The ball closer to your feet is the ball nobody can poke.
- Turn away from the second defender, not the first. The first defender is bait. Use the shield touch to make them commit, then release into the space they vacated.
- Accept the backward pass. The dribble exists to buy you a pass lane, not to beat two players every time. A completed backwards pass keeps possession; a failed double nutmeg ends the attack.
Ownership realities: what wears first and what slows you down
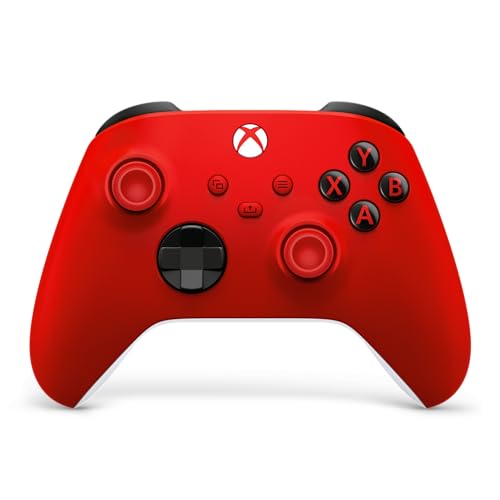
If you play with a controller, the analogue stick is the consumable. Thumbstick potentiometers and hall-effect modules both drift over time, and drift is fatal to dribbling specifically, because the bottom of the useful range — the 0–20% shield band — is exactly the range drift corrupts. Check it by leaving the stick untouched in a menu: if the player or cursor creeps, you have drift. A 5–10% dead zone hides it, but that dead zone also eats the first tenth of your deflection range, which is where shielding lives. Replacement thumbstick caps and grip covers are cheap and are a common coupon category if you’re refreshing worn sticks.
Display refresh rate sets the floor on your reaction time, and it’s worth knowing the numbers:
| Refresh rate | Frame time | What it means for the 80–120 ms release window |
|---|---|---|
| 60 Hz | 16.7 ms | Roughly 5–7 frames — feelable, not visible |
| 90 Hz | 11.1 ms | Roughly 7–11 frames — noticeably tighter |
| 120 Hz | 8.3 ms | Roughly 10–14 frames — most forgiving window |
Two other things wear on your dribbling before any hardware fails: sprint discipline and thumb position. Players who rest their thumb at the edge of the stick lose the low-deflection band entirely, because the smallest movement they can make is already a 40% push. Rest your thumb at centre and let the stick do the travel.
Frequently Asked Questions
Is there a dedicated dribble button in Goalbound?
No. Dribbling is resolved from the movement stick and your player’s speed, not from a separate input. Some builds offer a skill-move or knock-on input for specific actions, but the close-control dribble itself is entirely stick-driven. Check your in-game control settings screen to see exactly what is mapped on your platform.
Why does my player take a heavy touch as soon as a defender arrives?
Almost always because you pushed the stick harder, not softer, the moment you saw pressure. Deflection above roughly 50% pushes the ball out of the close-control animation. The fix is to arrive slower — release sprint two strides earlier — and drop into the 25–40% band rather than adding speed.
How do I keep the ball glued when two defenders press at once?
Drop to 15–25% deflection, use one shield touch to make the first defender commit, then turn away from the second and release into the space. Keep the ball within a stride throughout. If no lane opens after two touches, play the backward pass rather than forcing a third.
Is a controller better than touchscreen for dribbling?
For the fine control this guide describes, yes — a physical analogue stick gives you far more resolution in the 0–45% band than a thumb on glass. On touchscreen, widen your arcs, avoid micro-flicks, and work in the 30–45% range instead. The technique is identical; only the precision changes.
How long should I practise before the dribble feels automatic?
Most players see the press-simulation drill improve within three or four sessions of the 12-minute routine. The stick walk and cone weave usually click faster, in one or two sessions. The release-timing drill is the slow one because the window is short enough that you have to build it as a habit rather than consciously time it.
What should I check first if my dribbling suddenly got worse?
Check for stick drift before you blame your technique — leave the stick untouched in a menu and see whether anything creeps. If it does, a dead zone will mask it at the cost of your shield band, so replacing the stick module or caps is the better long-term fix. If there’s no drift, look at your display refresh rate and whether you’ve started sprinting earlier than usual.


Write Your Review
No reviews yet. Be the first to share your experience!